I finally deemed the hull ready to fiberglass this weekend. Being my first time ever working with fiberglass I've been nervous about it. I've gathered tons of online material about fiberglass for offline reading in the bush. I've asked a number of questions to glean from Gary D's many years of experience too. He, by far, has the most simplistic, least wasteful, least time consuming method I've come across so far. So I made that first step into the unknown on Saturday morning and fiberglassed the middle section.
I went with Gary's advice about the squeegee. Worked great. Poured the stuff on, starting the center of the hull and then squeegeed it around. Then I followed up with the brush. I'm overlapping the fiberglass 2" up the side of the hull. Squeegeeing didn't work too well on that part. Went with the brush. I also went with Gary's suggestion to try to get all three coats done in one full day, applying subsequent coats prior to the previous one fully curing. We're quite cool here in Mibu. So in order to get the temps to a point where things would cure fast enough to get all three coats on in a day, I started off in the morning by putting the hull out in the earliest sun light available, to warm it up a bit. I also warmed up the resin by putting the epoxy containers in warm water 1/2 hour before getting started. When ready, I moved the warmed hull indoors where the sun quickly warms things because of the corrugated tin roofing. I figured this whole process would have the hull actually cooling down rather than heating up as the resin cured, so as to not make bubbles from air expansion. OK, so done wetting by 9am. No bubbles to speak of and ready for second coat by 11am. Cloudy day, cooling off again around noon, so next round not ready till 2pm. There you have it... all three coats in one day.
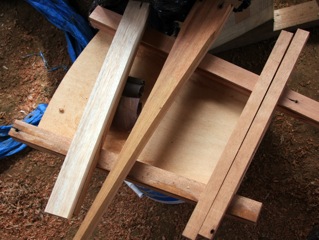
All in all, the whole process worked like a charm. This morning, I'm seeing a very clear lay up where all the detail of the wood is visible. Not that clarity matters since I'm painting over it, but hey, it's nice to know I can do it in case I ever want to build another boat someday. However, I can see the cloth on close inspection (see pic). Yet the detail of the wood is nicely seen.
OK, let's talk quantities here; For the middle section (largest surface area to cover) I used a total of 5 dixie cups full of resin. I'm talking about the little 5 oz kids cups here. The initial wetting of the glass used 3. Actually I mixed up three and only used about 2.25 of them. The rest got 're-allocated' to strengthening joints, filling gaps and shaping out the very front end of the foredecks around the stem. Back to numbers... The subsequent coats of epoxy each took significantly less epoxy to fill the weave, each one taking exactly one 5 oz dixie cup full. All in all, glassing the bottom of the middle section of Shan Skailyn took only 25 oz of resin, or about .7 liters. Again, that number is skewed a bit because I made about 3/4 dixie cup too much for wetting out the cloth. So it really should have only taken about 21-22 oz total. I would imagine that each end section would be about two-thirds of the surface area of the middle section, thus using that much less resin on each one.
At this point, I'm a lot less worried that I'll have to buy more resin. I think I'll have enough to squeeze by, especially if I'm careful with the glassing of the end sections. I've been paying careful attention to measuring my resin up to this point, using large syringes to measure out my quantities. Once I got an idea of how much resin is needed for glue, I've been able to use it with very little waste. Being careful with the measurements like that is paying dividends now as it looks like I'll be able to make this thing using 3.75 liters of epoxy (about a gallon) per Gary's recommendations in his book.