The attached file was originally sent with another message.
File Name: 2011_12_6148.jpeg
Showing posts with label primer. Show all posts
Sunday, December 18, 2011
Primer all done
Okay, let's try this email thing again. For some reason it seems incapable of delivering an email with its attachments. This is the message that was supposed to go with the last two pix.
At little odd times here and there through the week I managed to put the strip of fiberglass over the keel line of the ama as well as the reinforcing wraps around the end of the crossbeams where the ama struts mount and exert lots of forces that threaten splitting the beams.
Really the only thing left to paint will be the motor mounting bracket which I have yet to build. For the motor mount, I'm seriously thinking about deviating a bit from Gary's plans and lashing the thing on the crossbeam, rather than using a bolting assembly. I figure if I modify the design just a touch so that the sides, instead of just resting flat under the crossbeam, are built up a couple inches higher and then given cutouts into which the the crossbeam sits snugly, then some nice tight lashing should hold the thing quite well. Can anyone with experience tell me if this is folly? After assembling Shan Skailyn the other day and seeing just how amazingly strong those lashings are, I figure with the proper modifications the motor mount could be installed the same way (still using Gary's recommending anti-torqueing line of course).
Labels:
ama,
fiberglass,
motor mount,
paint,
primer
Wednesday, December 7, 2011
Keep on priming
Just another weekend of applying primer coat after primer coat after primer coat. You forget how much work painting is! Painting, anxiously waiting and checking for it to dry, then sanding, and going through the whole process again... and again.
As of now, I've got 4 good coats of primer on the aft section of the hull with only 3 so far on the fore and mid sections. I'm debating whether or not 3 coats of primer is enough. First off, I'm tired of applying the stuff. Second, 3 heavy coats seems like it might just be enough. Especially considering that I've got at least 2 gloss top coat that will be going on later. BUT since this is just lowly acrylic house paint, I do want to make sure I'm applying the necessary amount to hold up a good long time. Is three coats of primer and 2 coats of gloss top coat enough for a boat that will always be out of the water when not in use?
Monday, November 28, 2011
Get 'yer primer on
Didn't have a lot of time to work on Shan Skailyn this weekend. BUT, I did manage to get the first two coats of primer on the aft section of the hull. In preparation for painting I had some little details to finish out, which I did. The leeboard mounting bracket is on and the holes are drilled, the mast step is located and fastened in place (pix forthcoming). At this point, other than some more sanding and scraping I'm ready to really push forward with painting everything.
Had a major disappointment yesterday afternoon when I put the second coat of primer on (planning 4 coats of primer by the way). Not 10 minutes after I had applied the second coat and things were looking really nice, a HUGE storm blew in. The rain was extreme and the wind as well. It managed to blow both rain and mud all the way underneath my house, soaking a bunch of my plywood and my freshly painted hull. Not only was the new paint now diluted and dripping down the sides, but the paint that remained had lots of junk embedded in it! Ughhh! As of this morning, not a huge deal. Everything dried OK and after taking a scraper gently over the affected surface and a quick touch up with sandpaper we're sitting at a nice 1-1/2 coats of primer on this hull section.
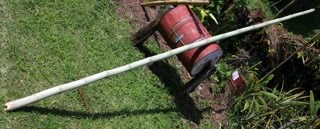
Also, up till this point I've not been super happy with any of the bamboo that I've had available for my spars. One of my friends mentioned a piece he'd cut recently which sounded like it'd work. He brought that up on Friday. It's a keeper! The dimensions at the base and head are just right. It's got a nice taper. It's thick walled and has an ever so slight curve up toward the head. So we got all the skin scraped off and I'm currently drying it. Also drilled some teeny tiny little holes just above all the lower nodes to drain out the water that collects in there and slows down the drying process.
Had a major disappointment yesterday afternoon when I put the second coat of primer on (planning 4 coats of primer by the way). Not 10 minutes after I had applied the second coat and things were looking really nice, a HUGE storm blew in. The rain was extreme and the wind as well. It managed to blow both rain and mud all the way underneath my house, soaking a bunch of my plywood and my freshly painted hull. Not only was the new paint now diluted and dripping down the sides, but the paint that remained had lots of junk embedded in it! Ughhh! As of this morning, not a huge deal. Everything dried OK and after taking a scraper gently over the affected surface and a quick touch up with sandpaper we're sitting at a nice 1-1/2 coats of primer on this hull section.
Also, up till this point I've not been super happy with any of the bamboo that I've had available for my spars. One of my friends mentioned a piece he'd cut recently which sounded like it'd work. He brought that up on Friday. It's a keeper! The dimensions at the base and head are just right. It's got a nice taper. It's thick walled and has an ever so slight curve up toward the head. So we got all the skin scraped off and I'm currently drying it. Also drilled some teeny tiny little holes just above all the lower nodes to drain out the water that collects in there and slows down the drying process.
Subscribe to:
Posts (Atom)